Now that you have seen how ildasm.exe and ilasm.exe can be used to perform a round-trip, you can get down to the business of checking out the syntax and semantics of CIL itself. The next sections will walk you through the process of authoring a custom namespace containing a set of types. However, to keep things simple, these types will not contain any implementation logic for their members (yet). Once you understand how to create empty types, you can then turn your attention to the process of defining “real” members using CIL opcodes.
Create a new file named CilTypes.il using your editor of choice. The first task a CIL project will require is to list the set of external assemblies used by the current assembly. For this example, you will only make use of types found within mscorlib.dll. To do so, the .assembly directive will be qualified using the external attribute. When you are referencing a strongly named assembly, such as mscorlib.dll, you’ll want to specify the .publickeytoken and .ver directives as well:
.assembly extern mscorlib
{
    .publickeytoken = (B7 7A 5C 56 19 34 E0 89 )
    .ver 4:0:0:0
}
Note Strictly speaking, you are not required to explicitly reference mscorlib.dll as an external reference, as ilasm.exe will do so automatically. However, for each external .NET library your CIL project requires, you will need to author a similar .assembly extern directive.
The next order of business is to define the assembly you are interested in building using the .assembly directive. At the simplest level, an assembly can be defined by specifying the friendly name of the binary:
// Our assembly.
.assembly CILTypes { }
While this indeed defines a new .NET assembly, you will typically place additional directives within the scope of the assembly declaration. For this example, update your assembly definition to include a version number of 1.0.0.0 using the .ver directive (note that each numerical identifier is separated by colons, not the C#-centric dot notation):
// Our assembly.
.assembly CILTypes
{
    .ver 1:0:0:0
}
Given that the CILTypes assembly is a single-file assembly, you will finish up the assembly -definition using a single .module directive, which marks the official name of your .NET binary, CILTypes.dll:
.assembly CILTypes
{
    .ver 1:0:0:0
}
// The module of our single-file assembly.
.module CILTypes.dll
In addition to .assembly and .module are CIL directives that further qualify the overall structure of the .NET binary you are composing. Table 17-2 lists a few of the more common assembly-level directives.
Table 17-2. Additional Assembly-Centric Directives
| Directive | Meaning in Life |
| .mresources | If your assembly makes use of internal resources (such as bitmaps or string tables), this directive is used to identify the name of the file that contains the resources to be embedded. |
| .subsystem | This CIL directive is used to establish the preferred UI that the assembly wishes to execute within. For example, a value of 2 signifies that the assembly should run within a GUI application, whereas a value of 3 denotes a console executable. |
Now that you have defined the look and feel of your assembly (and the required external references), you can create a .NET namespace (MyNamespace) using the .namespace directive:
// Our assembly has a single namespace.
.namespace MyNamespace {}
Like C#, CIL namespace definitions can be nested within further namespaces. There is no need to define a root namespace here; however, for the sake of argument, assume you wish to create a root namespace named MyCompany:
.namespace MyCompany
{
.namespace MyNamespace {}
}
Like C#, CIL allows you to define a nested namespace as follows:
// Defining a nested namespace.
.namespace MyCompany.MyNamespace{}
Empty namespaces are not very interesting, so let’s now check out the process of defining a class type using CIL. Not surprisingly, the .class directive is used to define a new class. However, this simple directive can be adorned with numerous additional attributes, to further qualify the nature of the type. To illustrate, add a public class to your namespace named MyBaseClass. As in C#, if you do not specify an explicit base class, your type will automatically be derived from System.Object.
.namespace MyNamespace
{
    // System.Object base class assumed.
    .class public MyBaseClass {}
}
When you are building a class type that derives from any class other than System.Object, you make use of the extends attribute. Whenever you need to reference a type defined within the same assembly, CIL demands that you also make use of the fully qualified name (however, if the base type is within the same assembly, you can omit the assembly’s friendly name prefix). Therefore, the following attempt to extend MyBaseClass results in a compiler error:
// This will not compile!
.namespace MyNamespace
{
    .class public MyBaseClass {}

    .class public MyDerivedClass
        extends MyBaseClass {}
}
To correctly define the parent class of MyDerivedClass, you must specify the full name of MyBaseClass as follows:
// Better!
.namespace MyNamespace
{
    .class public MyBaseClass {}

    .class public MyDerivedClass
        extends MyNamespace.MyBaseClass {}
}
In addition to the public and extends attributes, a CIL class definition may take numerous additional qualifiers that control the type’s visibility, field layout, and so on. Table 17-3 illustrates some (but not all) of the attributes that may be used in conjunction with the .class directive.
Table 17-3. Various Attributes Used in Conjunction with the .class Directive
| Attributes | Meaning in Life |
|---|---|
| public, private, nested assembly, nested famandassem, nested family, nested famorassem, nested public, nested private | CIL defines various attributes that are used to specify the visibility of a given type. As you can see, raw CIL offers numerous possibilities other than those offered by C#. Refer to ECMA 335 for details if you are interested. |
| abstract, sealed | These two attributes may be tacked onto a .class directive to define an abstract class or sealed class, respectively. |
| auto, sequential, explicit | These attributes are used to instruct the CLR how to lay out field data in memory. For class types, the default layout flag (auto) is appropriate. Changing this default can be helpful if you need to use P/Invoke to call into unmanaged C code. |
| extends, implements | These attributes allow you to define the base class of a type (via extends) or implement an interface on a type (via implements). |
As odd as it may seem, interface types are defined in CIL using the .class directive. However, when the .class directive is adorned with the interface attribute, the type is realized as a CTS interface type. Once an interface has been defined, it may be bound to a class or structure type using the CIL implements attribute:
.namespace MyNamespace
{
	// An interface definition.
	.class public interface IMyInterface {}

	// A simple base class.
	.class public MyBaseClass {}

	// MyDerivedClass now implements IMyInterface,
	// and extends MyBaseClass.
	.class public MyDerivedClass
		extends MyNamespace.MyBaseClass
		implements MyNamespace.IMyInterface {}
}
Note The extends clause must precede the implements clause. As well, the implements can incorporate a comma-separated list of interfaces.
As you recall from Chapter 9, interfaces can function as the base interface to other interface types in order to build interface hierarchies. However, contrary to what you might be thinking, the extends attribute cannot be used to derive interface A from interface B. The extends attribute is used only to qualify a type’s base class. When you wish to extend an interface, you will make use of the implements attribute yet again:
// Extending interfaces in terms of CIL.
.class public interface IMyInterface {}

.class public interface IMyOtherInterface
    implements MyNamespace.IMyInterface {}
The .class directive can be used to define a CTS structure if the type extends System.ValueType. As well, the .class directive must be qualified with the sealed attribute (given that structures can never be a base structure to other value types). If you attempt to do otherwise, ilasm.exe will issue a compiler error.
// A structure definition is always sealed.
.class public sealed MyStruct
extends [mscorlib]System.ValueType{}
Do be aware that CIL provides a shorthand notation to define a structure type. If you use the value attribute, the new type will derive the type from [mscorlib]System.ValueType automatically. Therefore, you could define MyStruct as follows:
// Shorthand notation for declaring a structure.
.class public sealed value MyStruct{}
.NET enumerations (as you recall) derive from System.Enum, which is a System.ValueType (and therefore must also be sealed). When you wish to define an enum in terms of CIL, simply extend [mscorlib]System.Enum:
// An enum.
    .class public sealed MyEnum
        extends [mscorlib]System.Enum{}
Like a structure definition, enumerations can be defined with a shorthand notation using the enum attribute:
// Enum shorthand.
.class public sealed enum MyEnum{}
You’ll see how to specify the name/value pairs of an enumeration in just a moment.
Note The other fundamental .NET type, the delegate, also has a specific CIL representation. See Chapter 11 for details.
Generic types also have a specific representation in the syntax of CIL. Recall from Chapter 10 that a given generic type or generic member may have one or more type parameters. For example, the List<T> type has a single type parameter, while Dictionary<TKey, TValue> has two. In terms of CIL, the number of type parameters is specified using a backward-leaning single tick, `, followed by a numerical value representing the number of type parameters. Like C#, the actual value of the type parameters is encased within angled brackets.
Note On most keyboards, the ` character can be found on the key above the Tab key (and to the left of the 1 key).
For example, assume you wish to create a List<T> variable, where T is of type System.Int32. In CIL, you would author the following (which could appear in any CIL method scope):
// In C#: List<int> myInts = new List<int>();
newobj instance void class [mscorlib]
    System.Collections.Generic.List`1<int32>::.ctor()
Notice that this generic class is defined as List`1<int32>, as List<T> has a single type parameter. However, if you needed to define a Dictionary<string, int>type, you would do so as the following:
// In C#: Dictionary<string, int> d = new Dictionary<string, int>();
newobj instance void class [mscorlib]
System.Collections.Generic.Dictionary`2<string,int32>::.ctor()
As another example, if you have a generic type that uses another generic type as a type parameter, you would author CIL code such as the following:
// In C#: List<List<int>> myInts = new List<List<int>>();
newobj instance void class [mscorlib]
    System.Collections.Generic.List`1<class
        [mscorlib]System.Collections.Generic.List`1<int32>>::.ctor()
Even though you have not yet added any members or implementation code to the types you have defined, you are able to compile this *.il file into a .NET DLL assembly (which you must do, as you have not specified a Main() method). Open up a command prompt and enter the following command to ilasm.exe:
ilasm /dll CilTypes.il
Once you have done so, you are able to open your binary into ildasm.exe (see Figure 17-3).
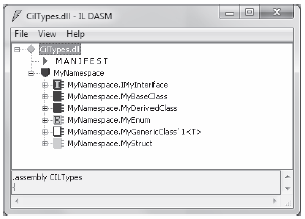
Figure 17-3 The CILTypes.dll assembly
Once you have confirmed the contents of your assembly, run peverify.exe against it:
peverify CilTypes.dll
Notice that you are issued errors, given that all your types are completely empty. Here is some partial output:
Microsoft (R) .NET Framework PE Verifier. Version 4.0.21006.1
Copyright (c) Microsoft Corporation. All rights reserved.

[MD]: Error: Value class has neither fields nor size parameter. [token:0x02000005]
[MD]: Error: Enum has no instance field. [token:0x02000006]
...
To understand how to populate a type with content, you first need to examine the fundamental data types of CIL.